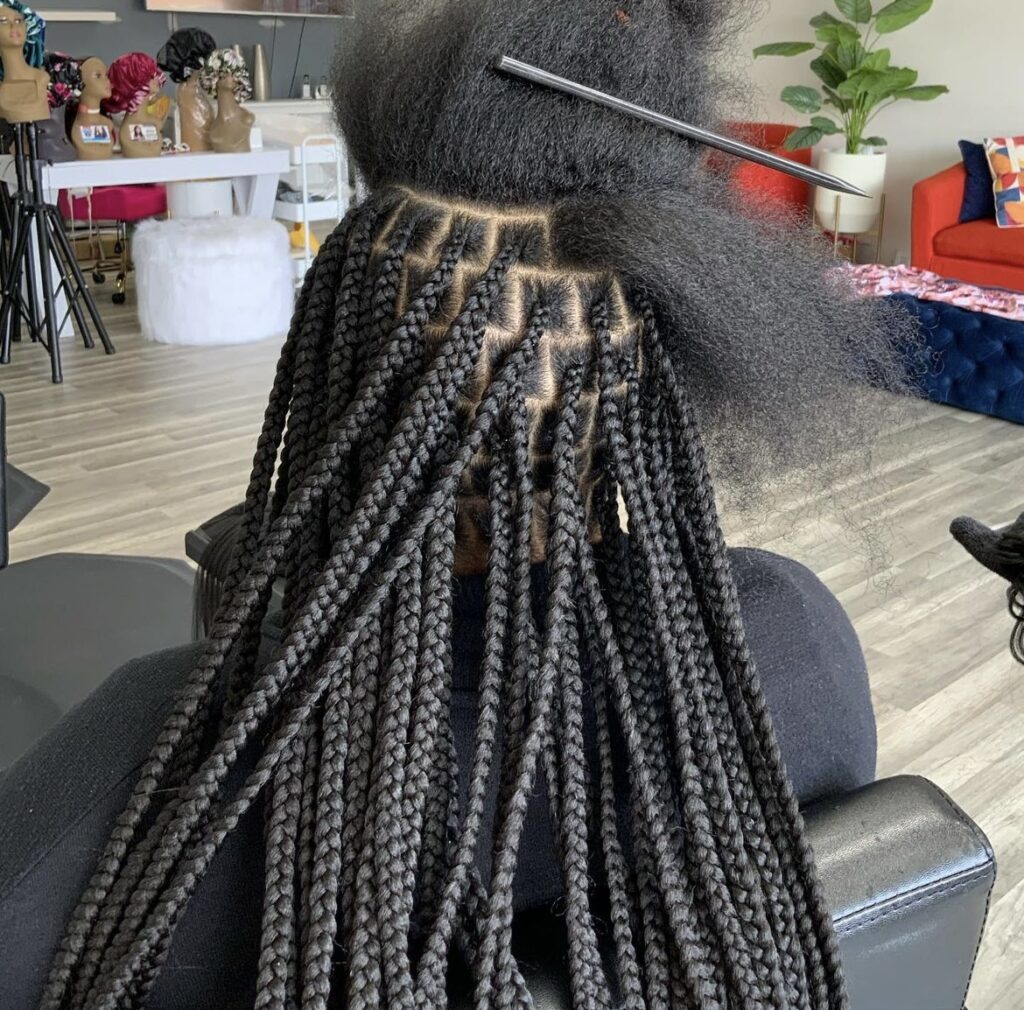
Hey there, beautiful! Ever wondered how to rock those stunning knotless braids you see everywhere? Well, you’re in luck because we’ve got your back! Knotless braids are not just a hairstyle; they’re a vibe. In this guide, we’ll take you through the steps to achieve flawless knotless braids effortlessly. So, grab your favorite snacks and let’s get started!
Why Knotless Braids?
1. Low Maintenance
Knotless braids are a game-changer for busy babes. They’re low maintenance and give you that effortlessly chic look without the hassle of dealing with knots and tension headaches.
2. Natural and Lightweight
Unlike traditional braids, knotless braids start small and gradually add extensions, making them feel super natural and lightweight. You’ll be turning heads with your new hairdo!
3. Versatility
One of the best things about knotless braids is the endless styling possibilities. From sleek and classic to bold and colorful, you can switch up your look whenever you’re feeling a vibe.
Preparing Your Hair
Shampoo + Condition Before Installing Braids
Make sure you are styling your braids on clean dry hair. I do not recommend a specific shampoo and conditioner but make sure you’re using something that works for your hair texture.
Prepping Your Braid Hair in Advance
Invest in quality hair extensions. Go for lightweight ones that match your hair color and desired length. This will ensure a seamless blend that looks and feels natural. You’l need to invest in a braid rack if you plan on taking braiding seriously but it is not essential for braiding hair. Check out my course to learn how I evenly section off the braid hair. You’ll need a different amount of packs of hair depending on if you’re doing small, medium or large braids.
For small braids, you’ll need about 6-8 packs of pre-stretched braid hair.
For medium braids, you’ll need about 5-7 packs of pre-stretched braid hair.
For small braids, you’ll need about 6 packs of pre-stretched braid hair.
Before I start braiding my extensions into my real hair, I like to spray my extensions with Pink Shine N Spray to detangle the locks and add luster. Split off tiny sections of hair. You can feel the width of each section with your finger to estimate the same size. Splitting your braid hair onto the braid rack in advance will save you time and energy when you start the braid process.
Essential Products and Tools
You don’t need a magic wand, just a few must-have products:
1. Braiding Hair
Choose high-quality braiding hair for a flawless finish. I bought 3 packs of 3 braid hair. So altogether, it was about 9 bundles of pre stretched hair. The bundles were thin and long which is why I required more hair. Please have any type of pre stretched hair to get you started.
2. Combs for Sectioning
A rat-tail comb is your best friend when it comes to creating neat sections. Precision is the name of the game.
3. Hair Clips and Hair Ties
Keep things organized with hair clips. They’ll save you from the frustration of searching for that perfect section.
4. Braiding Gel for Sleek Braiding Parts
You will use gel at the base of your braids and on your parts to ensure clean shiny sections.
5. Freeze Spray, Pink Shine N Spray
Happy, moisturized hair is healthy hair. Use a freeze spray to keep down those fly away hairs. Shine N Spray will give you the lustrous sheen you’re looking for.
6. Scissors
You’ll need these to taper the ends of your raids to the desired length and they’ll be helpful to cut away all the fly away hairs.
7. Braid Rack
This will be helpful to neatly place your braid extension hair. It’ll be easy to grab and will avoid tangles and a ball of mess.
Sectioning, Gripping and Adding Hair
1. Divide Hair into Neat Sections
Grab that rat-tail comb and create clean, neat sections. Use those hair clips to keep everything in place.
2. Parting Precision
Don’t rush the parting process. Take your time to create precise parts. It’s the foundation for flawless knotless braids.
Gripping
Split small square into 3 sections and loop under the middle strand. It’ll be easier to grip with shorter nails. It’s important to see what you’re doing whether you’re braiding your own hair or someone else’s hair. Check out my course to see how I was able to obtain clean small parts in the back of my head if you need . Place the balls of your finger tips on your scalp to ensure a tight grip and start braiding!
Finishing Touches
This is where the magic happens:
1. Seal the Ends
Apply a bit of edge control for that extra sleekness. Add extensions gradually to create a seamless blend. The key is to start small and build your way up.
2. Cut Away Fly Away Hair from the Braid and the ends
Embrace the feed-in method for even tension distribution. This not only looks more natural but also feels lighter on your scalp. Win-win!
3. Apply Mouse along the braids to seal the braid & spay Freeze Spray right after
Pump out a large amount of mouse into you hand and apply it your root to the end of each braid. This will seal the braid into place and will keep it from unraveling. After spray the hairspray, you’ll see your beautiful creation come to life.
4. After Care
Wrap your braids up with a silk scarf or some type of wave cap to lay everything into place.
Congratulations, you’ve just become a knotless braiding pro! Knotless braids are not just a hairstyle; they’re a statement. Embrace the versatility, enjoy the low maintenance, and let your creativity shine through your fabulous braids. You’re ready to turn heads and slay the hair game like the queen you are! Check out the detailed course tailored to help you master anyones braid including your own.